Cute Hairstyles for Your Lil' Honey!

Inspiration for Today

Homespun HoneyBee Designs

Copyright 2006-2012 Homespun HoneyBee Designs. Powered by Blogger.

Saturday, September 27, 2008

Party Pigtails

I love my 2 little girls.  I love that they are girls.  I love that they play with girls... That is precisely what they are GIRLS!  What is the big deal if they like to play swords or guns or soccer?  Does it matter what they play with and how they play? I believe so.  That is why I plan to purposely dress them and train them for their role as girls, ladies, and women.  We talk often as we are playing together about how much I enjoy being their mommy and that I wouldn't be happy doing anything else.  Girlhood is short so make the most of it!
Here is a shot of Firefly getting ready for her 4th birthday.It's not the best 'do for her little bob but it allows me to add some pizazz up top for her big day.
1- With your rattail comb just part the hair slightly off center (or whatever your parting preference is) then, 2- collect two even sections from in front of the ears on each side.  3-Secure with elastics.  I find that I like to do this so that the style lasts all day.  Her hair remains secure and in place without the assistance of the bows.  They are just there to be the "icing on the cake" so to speak. 4- Add your bows or ribbon of choice and you are good to go.
I just love how these loopy bows turned out!  They are bright and cheery just like Firefly..
-The Homestylemom

Wednesday, June 11, 2008

The Accessory Aisle: Headbands II


Skill level -4, Time Factor -3, Cuteness Factor -3
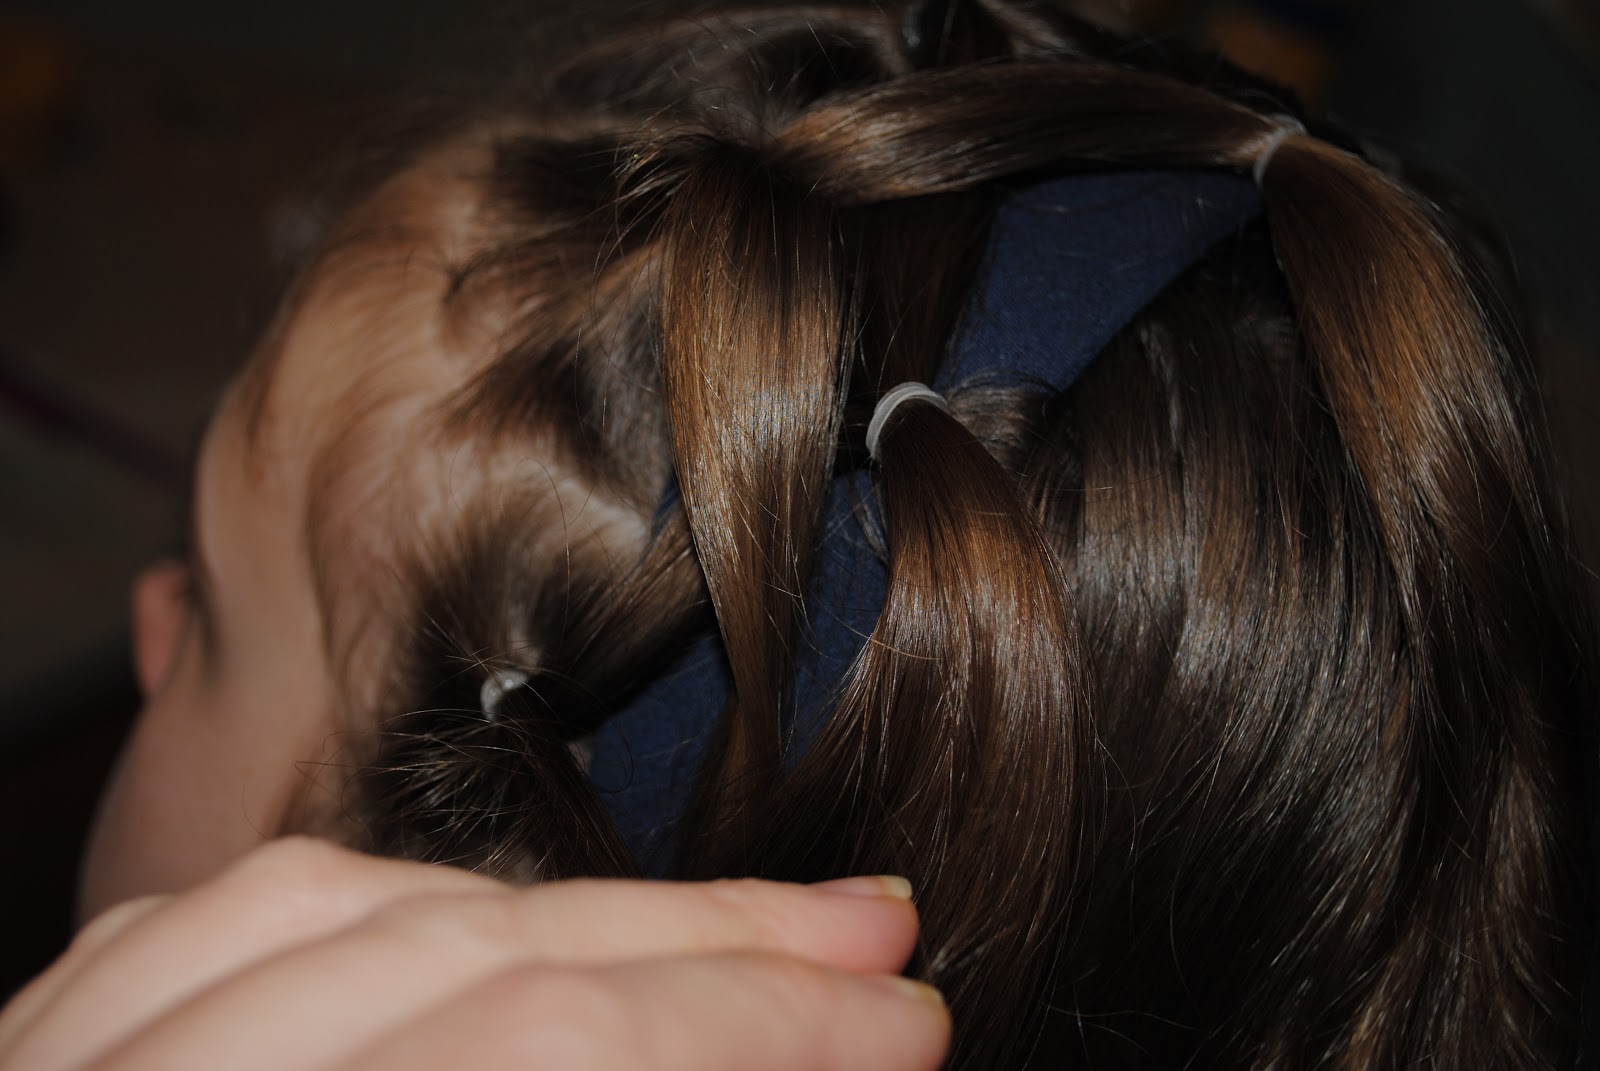
So last week I vowed to find a way to keep a headband in my lil' lady's hair.  I've decided to try to weave it in place.  Firefly's hair bob is just too short for me to try to weave something into it so I used Ruby's thick, wavy tresses instead.  She's got the curly locks rather than the straight strands that this style would be more suited for, but here goes.  You will need several elastics, based on the number of sections you'd like to make.  We made 6 across the front. Instructions are below each photo.
1- Begin by parting the hair from ear to ear.  Pull back the remainder of the hair into a ponytail elastic to keep it out of your way.

2- Divide the front hair in half and get one side out of your way.

3- Separate each half into three sections that you secure close to the scalp with elastics.

4- Here are our 6 sections across the front.

5- Now place the headband in the hair.  Split the front two ponies in half and cross your two front center pieces over each other forming an X.

6-Secure these X'ed ponies into an elastic.  Use just a small section of hair from the crown.  Secure it closely to the headband in order to hide it and to keep from having the "slide up lumps" when you tighten them.
NOTE:  I should have used the elastics we have that match her hair color in order to avoid the stark contrast.  You really want the pony elastics to not show.

7- Continue to divide, X, and secure from the middle out until you are left with one remaining outside tail at each ear.
  8- Grab one final elastic and have her pull her hair up off her neck and hold.

9- Secure this section with an elastic at the nape of her neck.
10- You should have something that looks like this.  As you can see, the elastics contrast too much and the headband is too dark for her hair color.  It should have been lighter.
Thanks for your patience, Ruby.  You are a jewel!!
Now go enjoy your day with your headband in place!
-The Homestylemom

Monday, June 2, 2008

The Accessory Aisle: Headbands

My girls, especially Firefly, love to wear headbands.  I may be stubborn as a mule, but I really hate headbands!  I go through the trouble to get their hair all smooth and silky and then I carefully arrange the headband in their heads and away we go.  Moments later, the headband is out, being played with or repositioned, and she looks like her hair was never combed today.  I want the girls to wear and enjoy the lovely accessories I take the time to create for them, but I won't sacrifice them having ratty looking hair for that.  I am working on some 'dos that will be headband AND mom friendly.  I'll get back with those as soon as I can.  In the meantime, here are some of the headbands I've been working on.
These are just the plain grosgrain-wrapped headbands with interchangeable loops.

And here are some with the bows permanently attached.  They are so delicate and sweet and look great in the girls' hair.  I just need them to stay in like the hairbows do! Maybe I'll have to weave them in place...hmm?
-The Homestylemom

Wednesday, May 14, 2008

The Homestylemom Hairstyles for Girls

Welcome to my blog.  I am so blessed to be the mommy of two beautiful little girls.  I am enjoying motherhood and love dressing my little ladies in all things girly.  I especially love fixing their hair and putting them in hair bows.  Unfortunately, that love was getting expensive, so it was time for some DIY hair accessories.  Crafting and creating have always been favorite pursuits of mine so I decided to begin making bows and things for my girls and plan to share that here with you.  I have tons of ideas that I would love for you to stop back by soon to see.  I began selling my handmade creations in 2007 and it has been so much fun!   
Hope to see you often,
-The Homestylemom