Cute Hairstyles for Your Lil' Honey!

Inspiration for Today

Homespun HoneyBee Designs

Copyright 2006-2012 Homespun HoneyBee Designs. Powered by Blogger.
Showing posts with label fine hair. Show all posts

Wednesday, March 7, 2012

Princess for a Day

Try this for: Any hair type. Skill Level -2 Time Factor -2 Cuteness Factor-2.5
When your princess is requesting a crown for her head, why not try this?
 My little Merry wanted a "princess head" so this is what I came up with.  With her, my goal is always to sweep the hair away from her sweet little face so I can see what she is up to!  After misting her hair lightly with water I gave it a heavy zigzag part.  Each side was then pulled into an elastic parallel to the top of each ear.  I then pulled each pony through with a Topsy Tail at the top of her ears.  Then I gave each of those little ponies a twist braid.  If you are not familiar with how to do a twist braid, visit here for a quick and easy Youtube video tutorial to see how it's done.  Here are a couple shots of each side of her head.

As you can see, the two twists are just neatly pulled back into a shared elastic that causes the braid to sit atop her head much like a crown would.  Easy peasy!!
I think she is pleased with how her "princess head" turned out.  What do you think?
If you are looking for something sweet to accessorize your Sweeties use THIS WEEKS COUPON CODE: SPRING BLING for 15% off any item in my shop.  Now go enjoy your day!
-The Homestylemom

Tuesday, February 7, 2012

Bed Bug to Love Bug

Try this for: Thin or short hair.  Super long hair without bangs.
Skill Level - 2 Time Factor - 2 Cuteness Factor - 2
This week Merry had a bit of a bug and was pretty pitiful for much of the day.  I was glad when the end of the week came and she was ready for "hairdo me."  That is what she says when she is ready for me to do her hair.
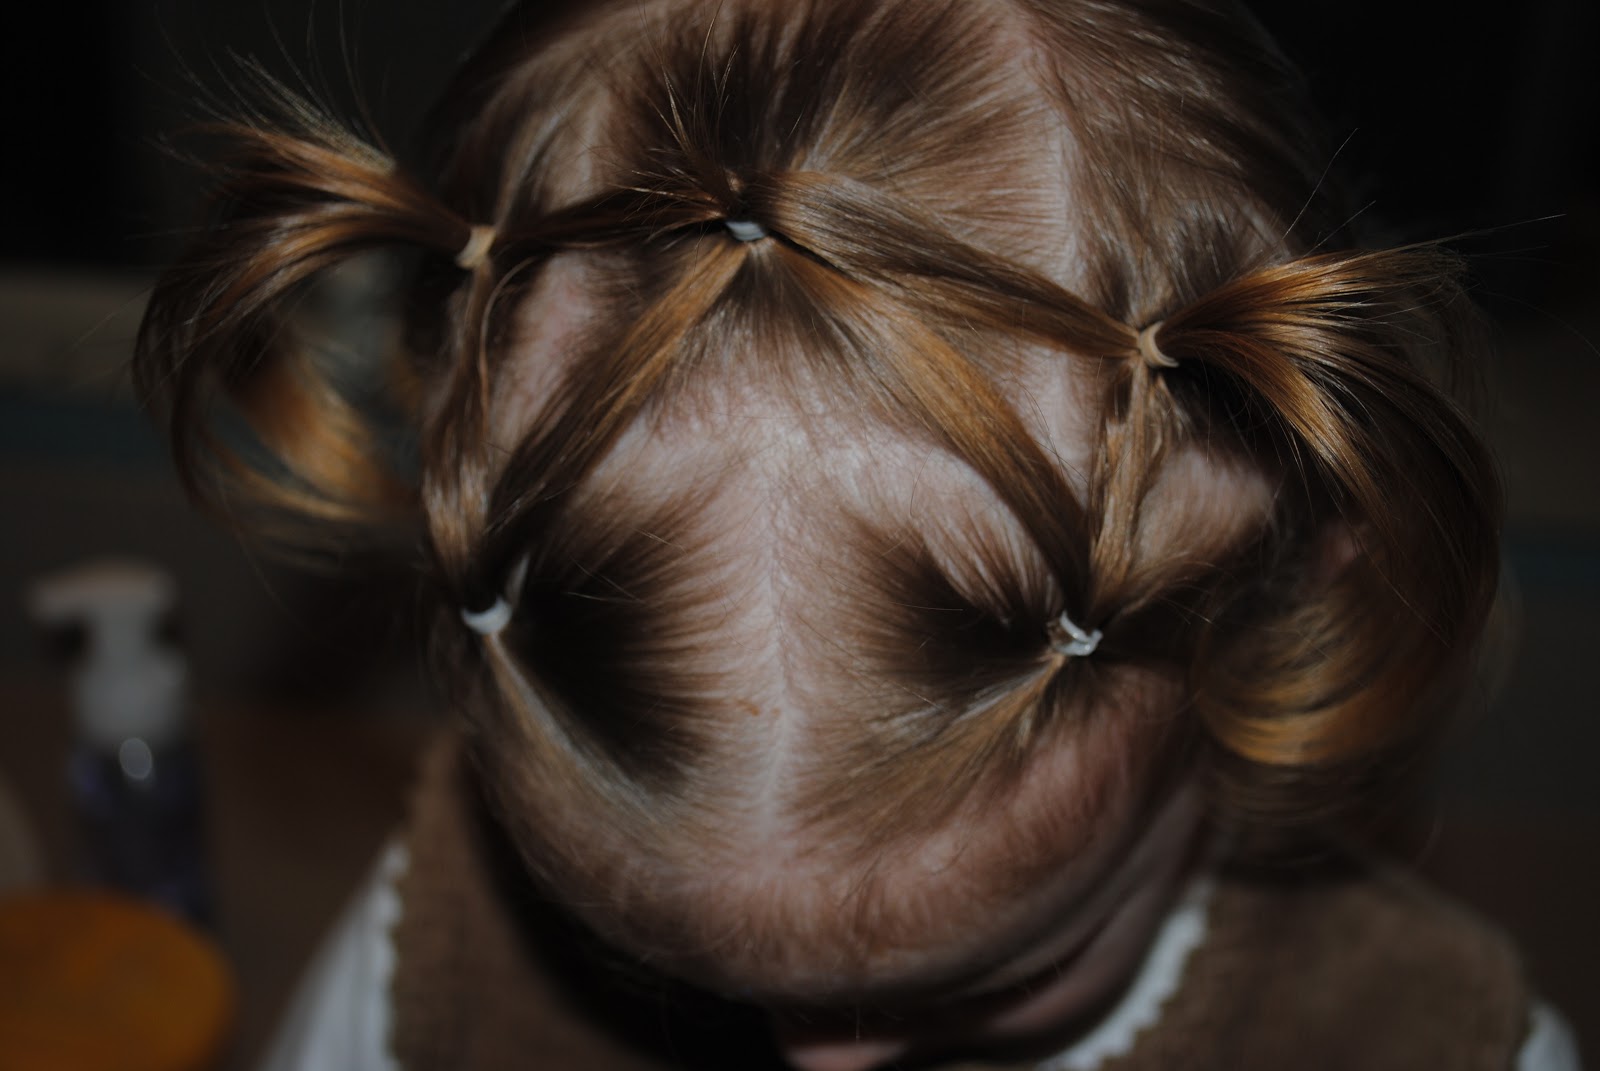
 This really is a simple 'do That is based on a 2-1-2 pattern with elastics.  Begin by wetting and parting out the front of the hair into two sections.  Secure with elastics. 
Gather a horseshoe-shaped section of hair at the top of the head and pull it into a pony with Half of the front right ponytail and Half of the front left ponytail.
Part the hair behind that center pony to the top of the ear in half.  Split that top center pony in half and secure it into an elastic with the parted hair on the left AND the hair from the front left pony.  Take the remaining hair from the top center and put it into and elastic on the right side of the head with that hair AND the hair from the front right pony.  I like to place these right on top and close to the head so that they spring to life!  That is the main reason they look so adorable on little ones.  It is like a bugs antennae sitting atop her head.
And now the front top view.
And here she is from the front.  This would also look TERRIFIC with a pair of ponytail bows from my shop.

THIS WEEKS COUPON CODE for Free Shipping: LuvBug12.  Now go enjoy your day!
-The Homestylemom

Monday, January 30, 2012

Have a Curl and a Smile

 Skill Level -1 Time Factor -1.5 Cuteness Factor -2.5
Try this on: Babies or Toddlers with little or no hair.  My model today is Merry.  As a toddler she spends most of her time playing.  Often she is on the floor with her blocks, dolls, or puzzles, looking down at the ground.  At this stage my goal with her hair is mainly just to keep it out of her eyes as it is growing in.  The back is pretty well past her shoulders when sopping wet, and curls up nicely when dry.  For this play day style you will need your toolbox with 4 elastics ready to use.  I sprayed her dry hair with water and massaged in a dimes worth of our favorite Curling Creme to separate and define her sweet little curls in the back.
1- Separate the front of the hair by parting it with your rat tail comb from ear to ear.  Part again down the middle in the front.  Take a section from the left side of the part and secure it into an elastic.  Take the ponytail from that elastic and join it with the bottom section of hair and secure into another elastic.
2- Repeat on the other side of head.
And voila!! You have a curl and a smile:
  Use THIS WEEKS COUPON CODE: SPRUNG12 for 20% off any purchase in my shop.
Now go enjoy your day!
-The Homestylemom